
In future I am planning some DS18B20 temperature measuring with ESP8266 and to show the values I will be using 1.8″ GLCD. Like the one on the photo below (top and bottom view):

I program ESP8266 using Sloeber which is basically Arduino using Eclipse. I like Eclipse a lot.
I am using Adafruit_ST7735 and Adafruit_GFX libraries.
First we need to connect everything. Below is connection table:
| GLCD | ESP8266 |
| 1 – RST | D0 |
| 2 – CS | D1 |
| 3 – D/C | D2 |
| 4 – DIN | D7 |
| 5 – CLK | D5 |
| 6 – VCC | +3V3 |
| 7 – BL | +3V3 |
| 8 – GND | GND |
Now we start coding. First we select File -> New -> Arduino Sketch in Sloeber…

…next we give name to project (anything you want that doesn’t exist already) and click Next (do not click Finish!!!)…

…if we didn’t do ESP8266 project before we need to set some settings (your COM port might be different from mine). Again click Next (NOT Finish to continue)…

…here we choose empty project (Default ino file) and click Finish…

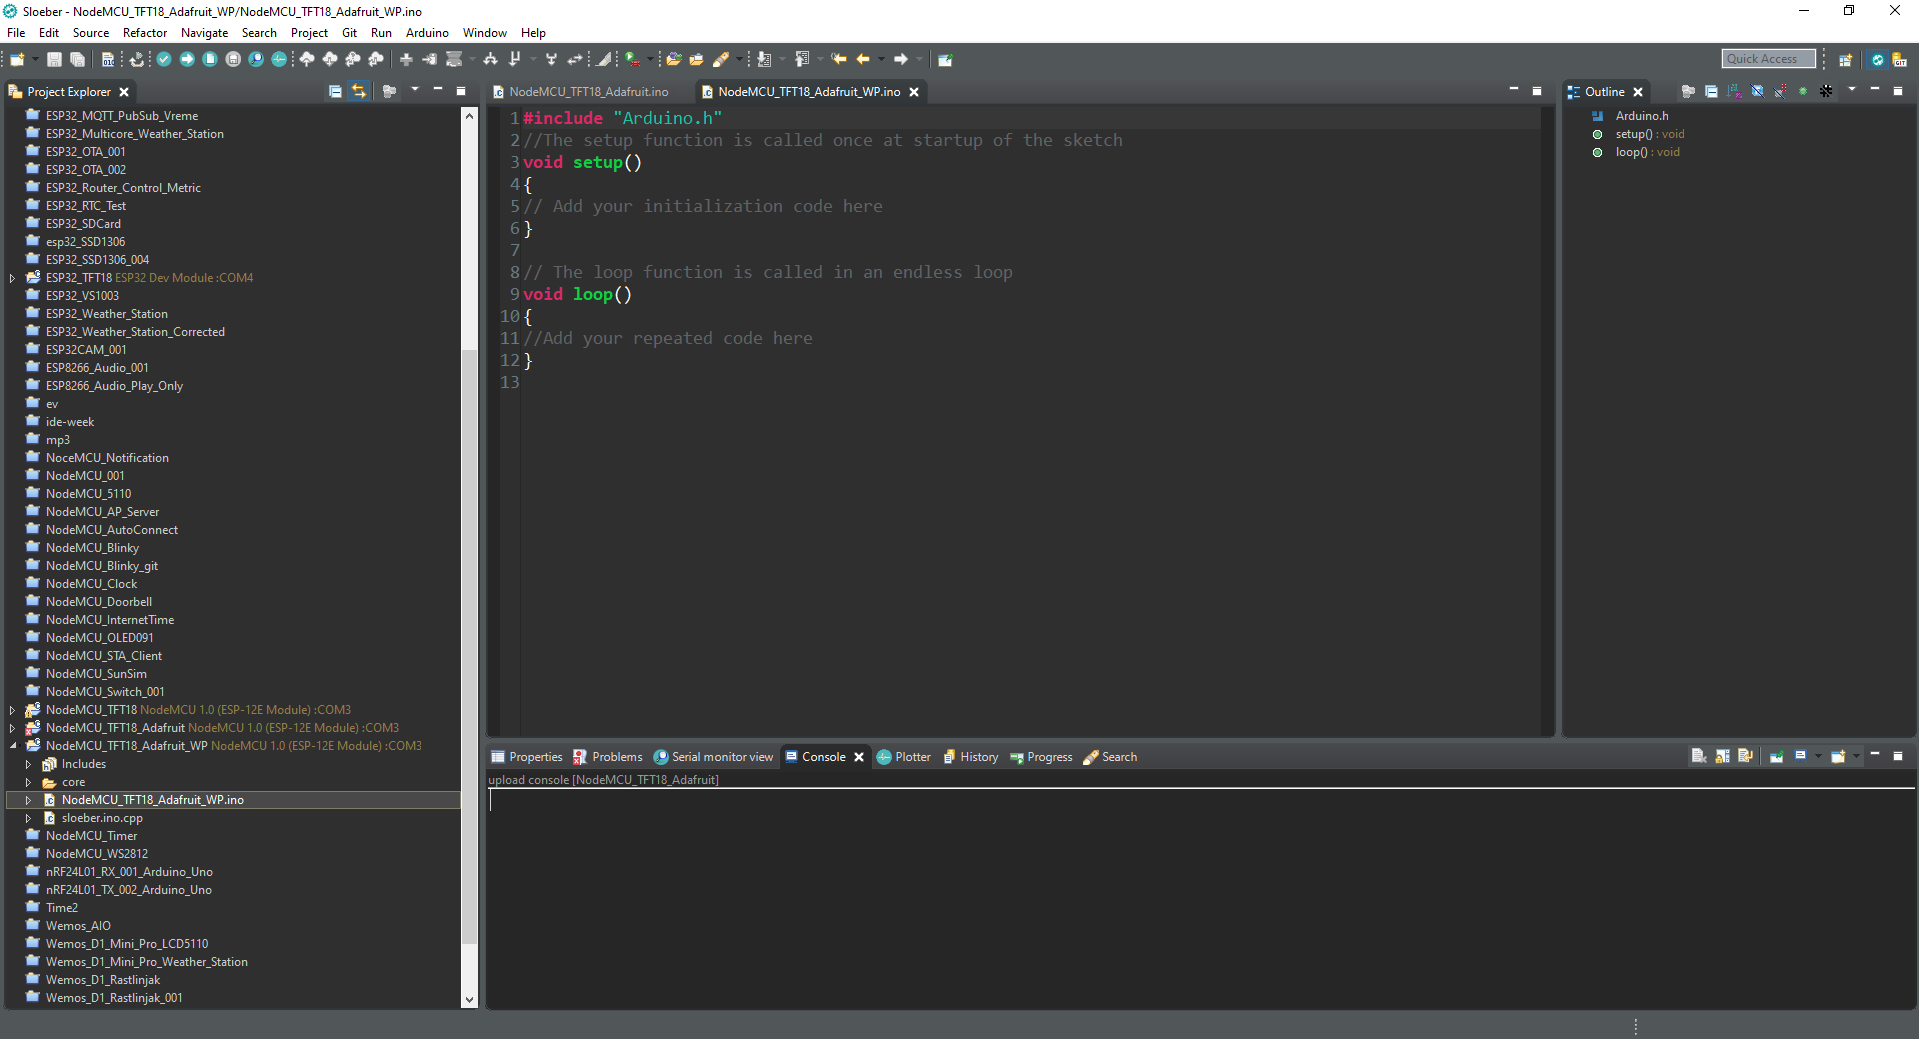
…and here we have project created:
I use dark theme for ease on the eyes. You can change this by clicking Window -> Preferences and under General -> Appearance select Dark:

While in these settings also check that you have checked both checkboxes marked below:

Now we start creating our program. First we add includes for GLCD libraries. Sloeber needs Arduino.h included:
|
1 2 3 4 |
#include "Arduino.h" #include <Adafruit_GFX.h> #include <Adafruit_ST7735.h> #include <SPI.h> |
We also need to define a few pins:
|
1 2 3 |
#define TFT_RST D0 #define TFT_CS D1 #define TFT_DC D2 |
Next we need a couple of color definitions for later:
|
1 2 3 4 5 6 7 8 |
const uint16_t GLCD_Color_Black = 0x0000; const uint16_t GLCD_Color_Blue = 0x001F; const uint16_t GLCD_Color_Red = 0xF800; const uint16_t GLCD_Color_Green = 0x07E0; const uint16_t GLCD_Color_Cyan = 0x07FF; const uint16_t GLCD_Color_Magenta = 0xF81F; const uint16_t GLCD_Color_Yellow = 0xFFE0; const uint16_t GLCD_Color_White = 0xFFFF; |
Finally need to define object (I am self thaught coder so I am not sure if this is the correct naming convention, please correct me in comments if you know what is right) for GLCD:
|
1 |
Adafruit_ST7735 tft = Adafruit_ST7735(TFT_CS, TFT_DC, TFT_RST); |
Now we can add Setup code (rotation is optional, I just happen to have display oriented this way):
|
1 2 3 4 5 6 |
tft.initR(INITR_BLACKTAB); tft.setRotation(1); tft.fillScreen(GLCD_Color_White); tft.setTextColor(GLCD_Color_Black); tft.setCursor(10, 10); tft.print("Hello world!"); |
If we try to compile at this moment we get a couple of errors. Let’s correct them!
We need to exclude drivers for ST7789 GLCD:
Right click each of two files marked green and choose Properties:

Select “Exclude resource from build” and click Apply and Close: The files will become dimmed and crossed over:
Now the project will compile and you can program your NodeMCU:

If you would like some nice custom font here is tutorial for that.
UPDATE:
I have another different LCD display that looks like this:

This display has ST7789 controller. And for this specific one, the libraries are not OK!!! The colors are inverted if you dont chage this (RGB->BGR) and whole screen is shifted for a few pixels.
Let’s correct that!
First we need to comment out include for ST7735 and add include for ST7759 (you may also noticed I changed font from last time):
|
1 2 3 4 5 6 |
#include "Arduino.h" #include <Adafruit_GFX.h> // Core graphics library //#include <Adafruit_ST7735.h> // Hardware-specific library for ST7735 #include <Adafruit_ST7789.h> // Hardware-specific library for ST7789 #include "NixieOne_Regular15pt7b.h" #include <SPI.h> |
We also now need to include .cpp and .h files in the library. See above where we disabled them, just do reverse procedure.
Now the project will argue about tft.initR we need to change it to:
|
1 2 3 4 5 6 7 8 9 10 11 |
// Use this initializer if using a 1.8" TFT screen: //tft.initR(INITR_BLACKTAB); // Init ST7735S chip, black tab // OR use this initializer (uncomment) if using a 1.44" TFT: //tft.initR(INITR_144GREENTAB); // Init ST7735R chip, green tab // OR use this initializer (uncomment) if using a 0.96" 180x60 TFT: //tft.initR(INITR_MINI160x80); // Init ST7735S mini display // OR use this initializer (uncomment) if using a 1.54" 240x240 TFT: tft.init(128, 160); // Init ST7789 240x240 |
Just comment out the line with initR and uncomment the one you see above and change resolution to 128 x 160.
Also we need to change the declaration (uncomment ST7789 and comment ST7735):
|
1 2 3 4 5 |
// For 1.44" and 1.8" TFT with ST7735 (including HalloWing) use: //Adafruit_ST7735 tft = Adafruit_ST7735(TFT_CS, TFT_DC, TFT_RST); // For 1.3", 1.54", and 2.0" TFT with ST7789: Adafruit_ST7789 tft = Adafruit_ST7789(TFT_CS, TFT_DC, TFT_RST); |
If you try program now the colors would be inverted. We can correct this in Adafruit_ST7789.cpp at line 69. Change from ST77XX_INVON to ST77XX_INVOFF.
There is one more thing to be corrected, in this same file. At line 102 there is an if statement for different resolutions we will ad the missing one and correct the offset at the same time. Replace the current code with this:
|
1 2 3 4 5 6 7 8 9 10 11 12 13 14 15 16 17 18 19 20 21 22 23 24 25 26 27 28 |
commonInit(NULL); if ((width == 240) && (height == 240)) { // 1.3" and 1.54" displays _colstart = 0; _rowstart = 80; } else if ((width == 135) && (height == 240)) { //1.13" display _colstart = 53; _rowstart = 40; } else if ((width == 128) && (height == 160))//TODO Slemi { //1.13" display _colstart = 2; _rowstart = 1; } else { _colstart = 0; _rowstart = 0; } WIDTH = width; HEIGHT = height; _width = width; _height = height; displayInit(generic_st7789); |
Now the display should work properly.
Thank you for reading!
Slemi