
In this part of tutorial we will finally get STEmWin working.
Well it has been a long time since last part 2 of this tutorial. I had to do a lot of reading and code writing to get this done.
You need to finish part 1 and part 2 to continue with this one!
Let me show you the steps to get it working.
First we need to import STEmWin files to our project.
We need to make a few directories in our project, first is GUI in root of our project and then we need two subfolders inc and lib:


Then we need to copy:
- all .h files from C:\Users\…\STM32Cube\Repository\STM32Cube_FW_F4_V1.19.0\Middlewares\ST\STemWin\inc to inc folder we just created


- file named STemWin540_CM4_GCC.a to lib folder we created


- from C:\Users\…\STM32Cube\Repository\STM32Cube_FW_F4_V1.19.0\Middlewares\ST\STemWin\Config we need four files. We need GUIConf.c and LCDConf_Lin_Template.c which we copy to src folder under root of our project and we need GUIConf.h and LCDConf_Lin_Template.h which we copy to inc folder in root of our project. We also need to rename booth LCDConf_Lin_Template files to just LCDConf. We do this bi right clicking on them and selecting Rename…
- We also need to copy file named GUI_X.c from C:\Users\Gregor\STM32Cube\Repository\STM32Cube_FW_F4_V1.19.0\Middlewares\ST\STemWin\OS folder.
Then we need to let the compiler know where it can find all this, right click on our project and select Properties.
Go to C/C++ General -> Paths and Symbols and do as following three screenshots:


Now we need to change some settings inside copied files:
- inside LCDConf.c we need to change lines 62-77:
123456789101112131415//// Physical display size//#define XSIZE_PHYS 240//TODO changed from 320#define YSIZE_PHYS 320//TODO changed from 240//// Color conversion//#define COLOR_CONVERSION GUICC_M8888I//// Display driver//#define DISPLAY_DRIVER GUIDRV_LIN_32//TODO changed from GUIDRV_WIN32 - for now we also need to comment out a few lines of code (lines 160-168):
123456789//// Set custom functions for several operations to optimize native processes////TODO implement functions below/* LCD_SetDevFunc(0, LCD_DEVFUNC_COPYBUFFER, (void(*)(void))CUSTOM_LCD_CopyBuffer);LCD_SetDevFunc(0, LCD_DEVFUNC_COPYRECT, (void(*)(void))CUSTOM_LCD_CopyRect);LCD_SetDevFunc(0, LCD_DEVFUNC_FILLRECT, (void(*)(void))CUSTOM_LCD_FillRect);LCD_SetDevFunc(0, LCD_DEVFUNC_DRAWBMP_8BPP, (void(*)(void))CUSTOM_LCD_DrawBitmap8bpp);LCD_SetDevFunc(0, LCD_DEVFUNC_DRAWBMP_16BPP, (void(*)(void))CUSTOM_LCD_DrawBitmap16bpp);*/ - inside GUIConf.c we need to change line 64 to:
1234//// Define the available number of bytes available for the GUI//#define GUI_NUMBYTES (1024 * 48) - at the end of GUIConf.h we need to add #define GUI_USE_ARGB and set its value to 0:
123456789/*********************************************************************** Configuration of available packages*/#define GUI_SUPPORT_MOUSE (1) /* Support a mouse */#define GUI_WINSUPPORT (1) /* Use window manager */#define GUI_SUPPORT_MEMDEV (1) /* Memory device package available */#define GUI_SUPPORT_DEVICES (1) /* Enable use of device pointers */#define GUI_USE_ARGB (0) - we also need to add a few lines of code to main function, so that we use all this added code and later see if everything works:
123456789101112131415161718192021222324252627/* USER CODE BEGIN 2 */BSP_LCD_Init();BSP_LED_Init(LED3);BSP_LED_Init(LED4);/* Layer2 Init */BSP_LCD_LayerDefaultInit(1, LCD_FRAME_BUFFER);/* Set Foreground Layer */BSP_LCD_SelectLayer(1);/* Clear the LCD */BSP_LCD_Clear(LCD_COLOR_WHITE);BSP_LCD_SetColorKeying(1, LCD_COLOR_WHITE);BSP_LCD_SetLayerVisible(1, DISABLE);/* Layer1 Init */BSP_LCD_LayerDefaultInit(0, LCD_FRAME_BUFFER + 0x130000);/* Set Foreground Layer */BSP_LCD_SelectLayer(0);/* Enable The LCD */BSP_LCD_DisplayOn();/* Clear the LCD */BSP_LCD_Clear(LCD_COLOR_GREEN);GUI_Init();GUI_SetBkColor(GUI_GREEN);GUI_SetColor(GUI_BLUE);GUI_Clear();/* USER CODE END 2 */
We only added last four lines of code, the ones that start with GUI_… - we also need a few more includes in main.c (last two):
1234567/* USER CODE BEGIN Includes */#include "stm32f429i_discovery.h"#include "stm32f429i_discovery_lcd.h"#include "stm32f429i_discovery_ts.h"#include "GUI.h"#include "DIALOG.h"/* USER CODE END Includes */ - and we need to initialize RAM and CRC clock:
12345678910/* Initialize all configured peripherals */MX_GPIO_Init();MX_DMA2D_Init();MX_FMC_Init();MX_I2C3_Init();MX_LTDC_Init();MX_SPI5_Init();BSP_SDRAM_Init();__HAL_RCC_CRC_CLK_ENABLE();/* USER CODE BEGIN 2 */
With all this done, we can now successfuly compile our project without errors. But we are not done yet, the program compiles, but does not work!
Now comes the toughest part, glueing our previous program and STEmWin.
For this we need to change some settings inside LCD_X_DisplayDriver function in file named LCDConf.c.
|
1 2 3 4 5 6 7 8 9 10 |
case LCD_X_SETORG: { // // Required for setting the display origin which is passed in the 'xPos' and 'yPos' element of p // //LCD_X_SETORG_INFO * p; //p = (LCD_X_SETORG_INFO *)pData; BSP_LCD_SetLayerAddress(0, VRAM_ADDR); //... return 0; } |
I commented out two orininal lines of code and added BSP_LCD_SetLayerAddress.
To use this function we also need to include stm32f429i_discovery_lcd.h in LCDConf.c and also LCDConf.h
|
1 2 3 4 |
#include "GUI.h" #include "GUIDRV_Lin.h" #include "LCDConf.h #include "stm32f429i_discovery_lcd.h" |
In LCDConf.c we also need to tell our program where SD RAM is located:
|
1 2 3 |
#ifndef VRAM_ADDR #define VRAM_ADDR 0xD0000000 // TBD by customer: This has to be the frame buffer start address #endif |
Now we can test some more STEmWin code. Put this inside main.c:
|
1 2 3 4 5 6 7 8 9 10 11 12 13 14 15 16 17 18 19 20 21 |
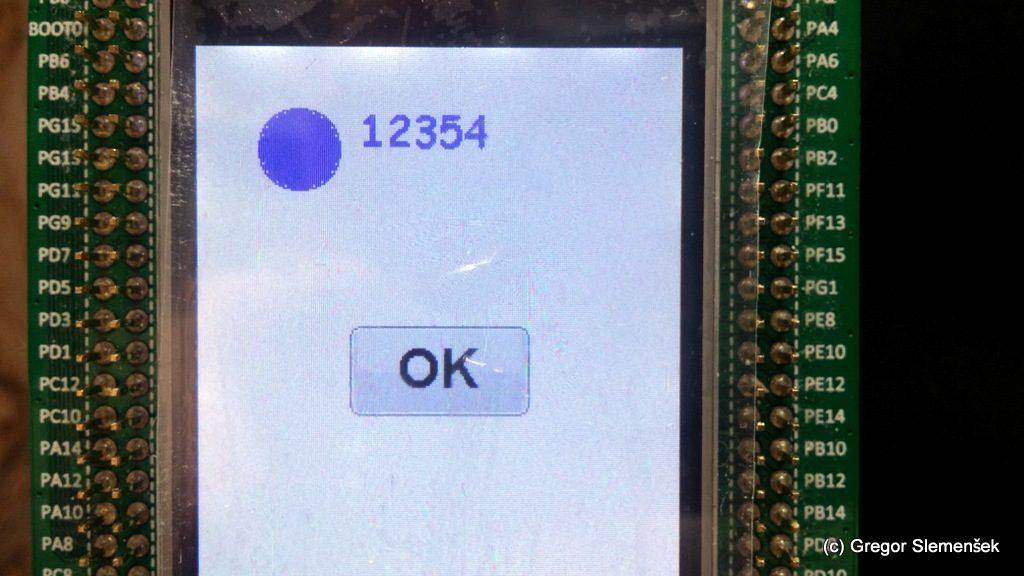
GUI_Init(); GUI_SetBkColor(GUI_WHITE); GUI_SetColor(GUI_BLUE); GUI_Clear(); GUI_DrawCircle(50, 50, 20); GUI_SetColor(GUI_ORANGE); GUI_FillCircle(50,50,19); HAL_Delay(2000); b1 = BUTTON_CreateEx((LCD_GetXSize() / 2) - 45,(LCD_GetYSize() / 2) - 22,90,45,0,WM_CF_SHOW,0,0); BUTTON_SetText(b1, "OK"); BUTTON_SetFont(b1, GUI_FONT_32B_ASCII); GUI_Exec(); HAL_Delay(2000); GUI_SetColor(GUI_BLUE); GUI_FillCircle(50,50,19); GUI_SetFont(GUI_FONT_COMIC24B_ASCII); GUI_DispDecAt(12354, 80, 30, 5); /* Infinite loop */ /* USER CODE BEGIN WHILE */ |
And define variable for button:
|
1 2 3 |
/* USER CODE BEGIN 1 */ static BUTTON_Handle b1; /* USER CODE END 1 */ |
Now compile and run code an wait a few seconds and you should see this screen:


This is it for now. If I ever learn more about STEmWin I might put some more advanced tutorial up.
Slemi
P.S.: If you found this helpful, I would appreciate clicking on Ad on the right side to give me a little “motivation”. 🙂